StandStrap: How I Designed a 3D Printed Snowboard Stopper
Reading time: 4 min
Every snowboarder knows the moment. You get off the lift, the board starts sliding down the slope on its own, and the only way to strap in without a fight is to sit down in the snow. Wet trousers, cold hands and a minute or two lost on every run.
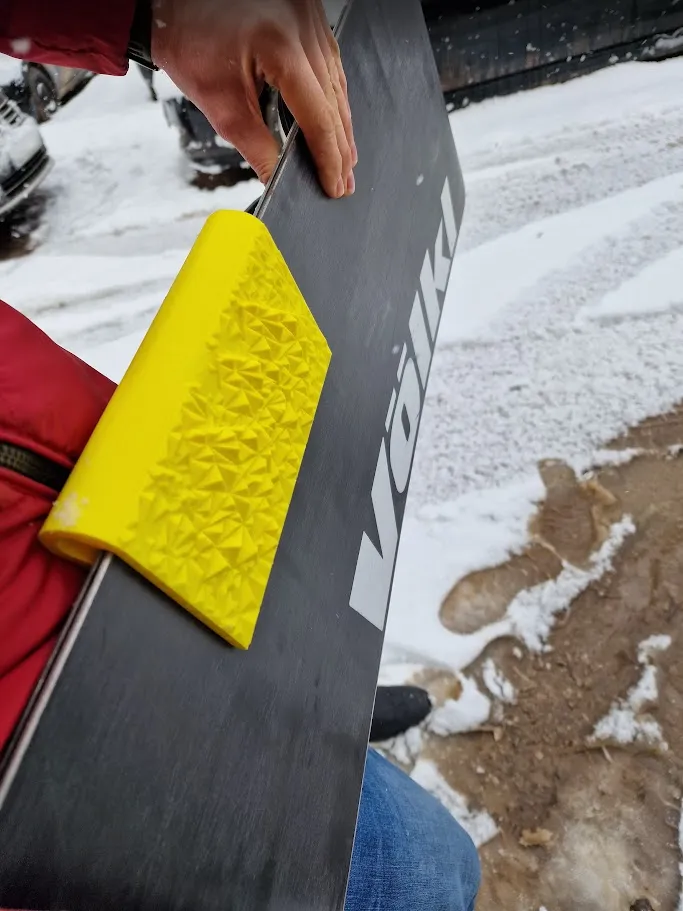
So I made StandStrap: a small clip that goes onto the edge of the board in a second. Its spiked plate sits under the base and bites into the snow, so the board stays exactly where you left it while you strap into your bindings standing up. Then you take it off, put it in your pocket and ride.

The inspiration: Gripsta
The idea isn't entirely mine, and I want to be clear about that. I was inspired by Gripsta, a snowboard stopper that solves exactly this problem. StandStrap is my own design, made from scratch for 3D printing, and it has nothing to do with Gripsta Gear. It isn't a partnership, and it isn't a copy of their product.
If you want a factory-made product with a rubber inner lining and a strap, get a Gripsta. They built it for mass production and it's well worth it. StandStrap is for anyone who wants to print one themselves, personalise it, or order a ready-printed one from us.
The design: two parts, and one of them is yours
The model is published on MakerWorld and is made of two separate parts:
- The body: the clip with its springy ‘hinge’ and the spiked plate underneath.
- The text on the top end: that's where I put my phone number. If the board gets lost, whoever finds it knows who to call.
The text is a text object in Bambu Studio: right-click → Edit Text, type your number and you're done. If you have an AMS (Bambu Lab's multi-colour filament system), you can print it in a different colour from the body.
My first version also had a slogan on the side (‘Make your own path!’, which you can see in the photos below). I took it off the published model. The side stays clean, and the personalisation goes where it really helps: the number that gets your board back to you.

The dimensions that make the clip hold
The clip is designed for a standard snowboard edge:
- ~7 mm gap at the ribs that grip the board;
- 10.5 mm opening at the ‘mouth’, so the edge slides in easily.
The whole model measures about 101 × 49 × 170 mm.

Printing it
These are the settings I print it with:
- Material: PLA (if you're not sure which type to choose, see the differences between PLA, PLA+ and PLA Pro);
- Nozzle: 0.4 mm;
- Layer height: 0.2 mm;
- No supports: it prints standing upright on its end, exactly as it's placed in the project file;
- 3–4 walls: I recommend them because the hinge flexes every time you put the clip on, and it has to last a whole season. Walls affect strength more than infill does; there's more on balancing the two in the article on infill in 3D printing.
According to Bambu Studio, one StandStrap takes about 137 g of PLA and just over 5 hours of printing (including preparation). The second colour for the text is tiny: less than half a gram.


On the slopes

Want a StandStrap?
- Ready-printed, with your number: order the StandStrap — snowboard stopper from our products page. We print it in the colour you choose.
- If you'd rather print it yourself: the model is published on MakerWorld. Download it, change the number and print.
Enjoy the ride, and no more floundering in the snow.